
Calligraphy is defined by its distinct thick and thin strokes. It can be a challenge achieving the proper variation in stroke thickness, especially when first learning any form of calligraphy and getting used to the required tools, hand and body positioning, and technique.
When first learning brush calligraphy, you want to establish a solid foundation that is rooted in good habits and strong building blocks. One of those building blocks is thin strokes: Gaining control over your pen and training your muscles to consistently create thin strokes as your write.
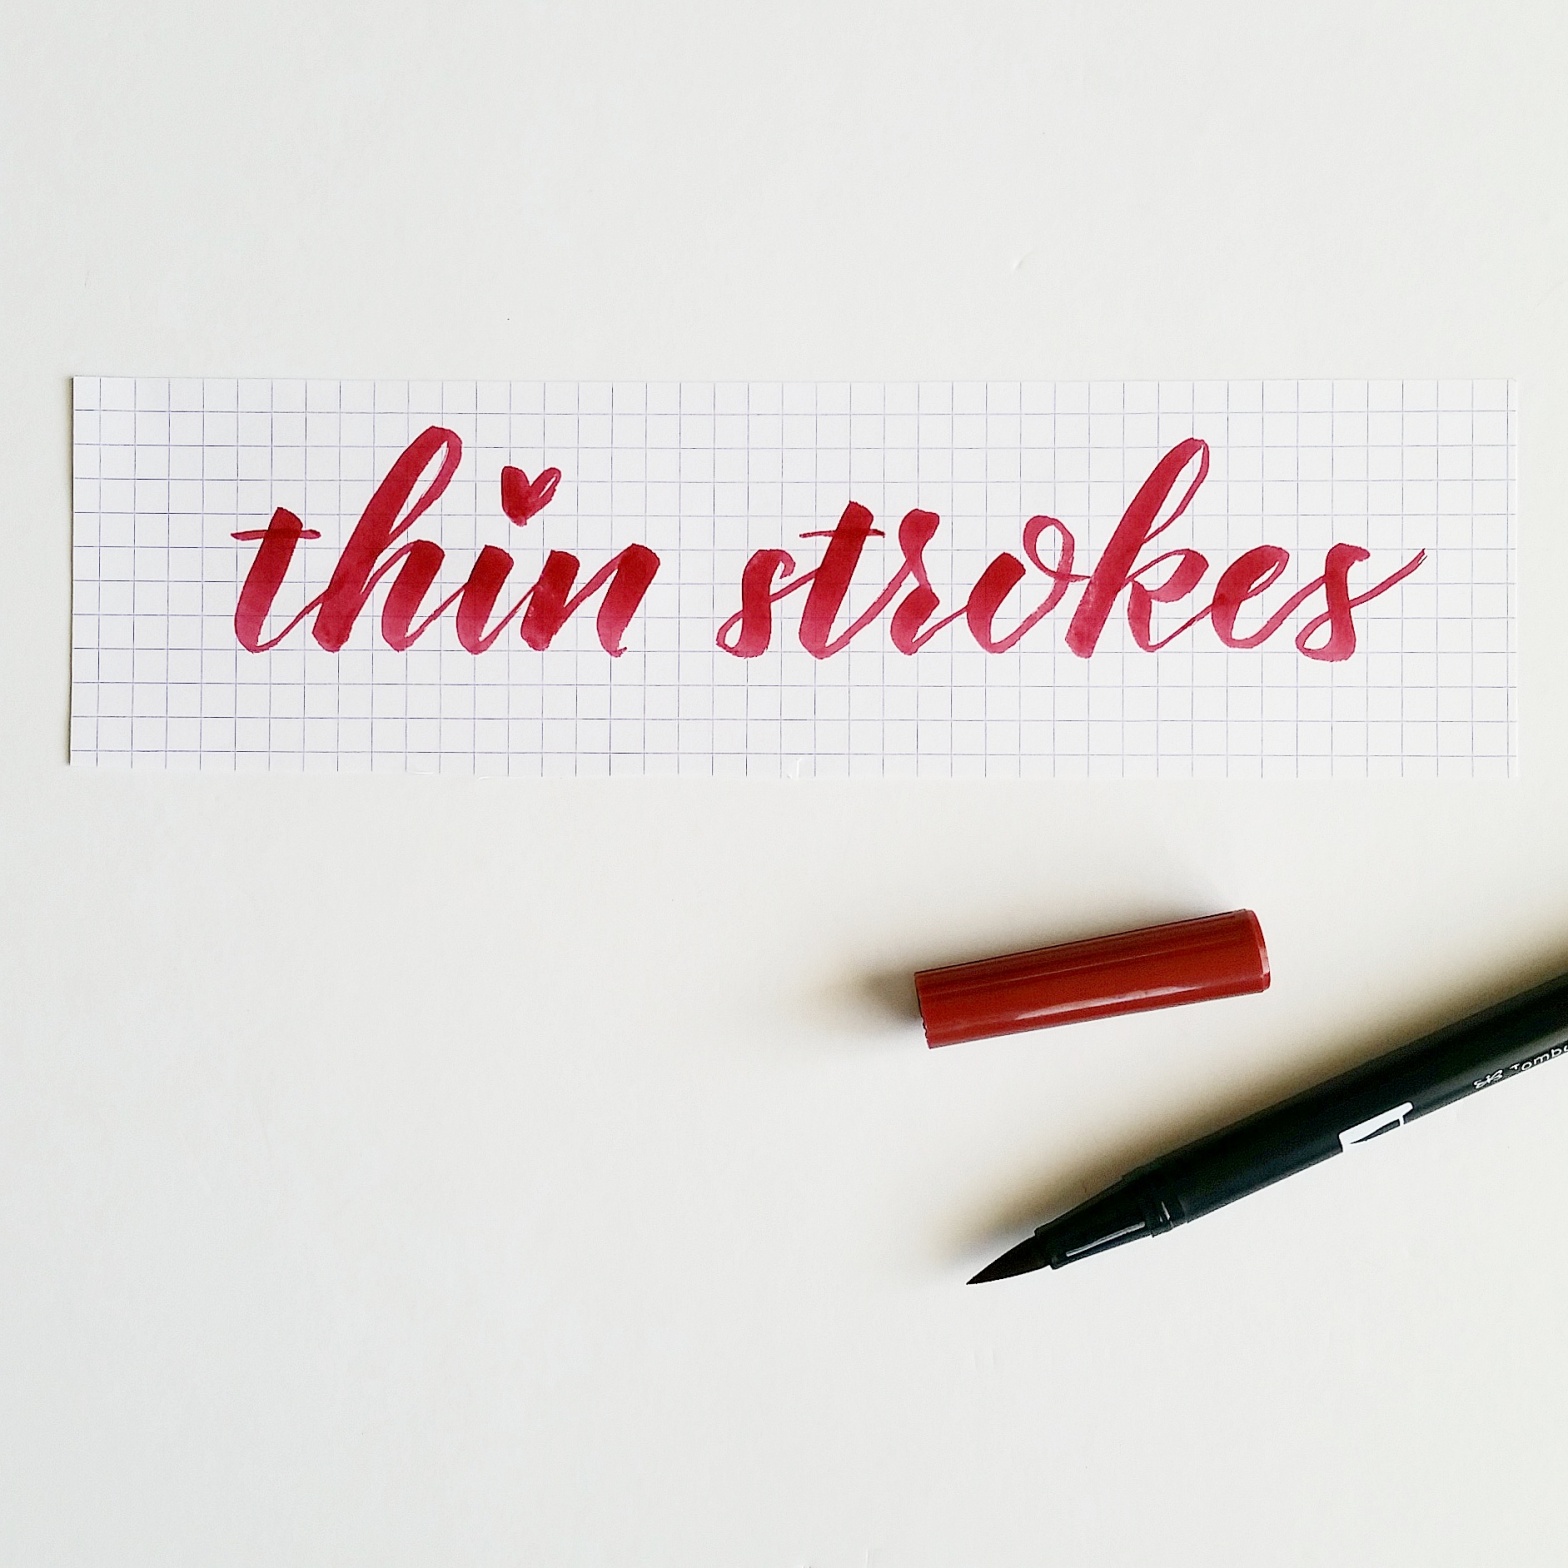
In this post, I will share three steps to improving your thin brush calligraphy strokes. Stay tuned for my video tutorial at the end that goes over everything you see here!

Try a different brush pen
Not all pens were created. Some are bigger than others, some have more flexible tips than others, and some are more stiff than others.
- Size: Obviously, the bigger a pen tip is, the bigger the strokes will be. I noticed this is the case with the Tombow dual brush pens – the brush tip is very big, so naturally it is very difficult to create a hairline-sized upstroke.
- Flexibility: The more flexible a pen tip is, the more challenging it is to control the pen and achieve very thin strokes. It is possible to do so, but you must maintain a steady hand and be sure to use the same pressure consistently throughout the stroke.
- Stiffness: The more stiff a pen tip, the easier it is to create a thin stroke. This is because you can get away with less control over the pen and still achieve the thin stroke. The pen tip is strong enough to maintain a thin line.

I recently compared my favorite brush pens in this post. Take a look!
Hold your pen at an angle
It is crucial to hold your pen at the proper angle. The less angled your pen, the harder it is to transition from thin to thick strokes and back again.

Try different angles to find the sweet spot for your pen. Since every brush pen is different in size, flexibility, and stiffness, the angle at which you hold each pen will not always be the same.

For more on finding the right grip, see my post on how to hold the brush pen. Be sure your grip is comfortable and that you position your body facing forward, straight ahead toward your writing surface. Then try to maintain your grip on the pen so that as you write, the angle of the pen does not change very much.
Break down each stroke
Breaking a task down into smaller, bite-sized pieces helps increases your ability to focus. When you try to take on too much too soon, you divide your attention and are able to focus less on each area you are trying to improve.
If you want to improve your thin strokes, then you must simply focus on the thin strokes. Don’t practice writing out long sentences, words, or even individual letters! Just focus on the thin strokes, and nothing else.

Fill a page, an ENTIRE page, with thin strokes. Pick a simple stroke, such as the entrance stroke to a letter, and slowly (I repeat: SLOWLY!) write the same stroke over and over until you reach the end of your page.
Video: Making your brush calligraphy strokes thinner
Watch this video to see the steps above in action!
~ ~ ~
It’s your turn!
Have you tried any of the steps above? Which one worked for you?
Do you have another tip to share on making thin strokes thinner? Let me know!
~ ~ ~
P.S. If you liked this post, I’d love if you would share it!
P. P. S. Be sure you are subscribed to my blog below so you don’t miss a post!

ok, so your little video taught me more than any other I have seen… and trust me in the past year of wanting to learn modern calligraphy , i have seen a bunch and paid for some pretty not so good classes. Thank you so so much!
LikeLike
Lindsay, you just about made my entire WEEK! Thank you for your kind words and support. I’m thrilled to be of any help. Let me know what you’d like to see next on the blog. Thanks for visiting!
LikeLike
Thanks so much for sharing your talents. This tutorial was exactly what I needed. 🙂
LikeLike
I’m thrilled to hear that, Joy! Thanks for visiting! Let me know what you’d like to see in future posts.
LikeLike
I’m very glad I stumbled on your instagram account because I have been searching Google some lessons on calligraphy. I am really clueless where to start. And I thought it would be best to start with copying the fonts but now I learned that I should start with the stroke first. I’ll try this later. Thank you!
LikeLike
I’m so glad, too! I just created a new page that lists all of the beginner posts and tutorials. Go check it out! It’s up at the menu, called: “Learn Brush Lettering.” Or you can go to: piecescalligraphy.com/learn. Happy writing!
LikeLike
Thank you for this very helpful post. I’m trying to learn brush calligraphy with the help of your tutorials. Could you possibly break down each letter of the English alphabet, perhaps a letter per post and then an exemplar at the end? It will be very helpful for my deliberate practice and for those like myself who are using your tutorials. Thanks so much and keep up the good work.
LikeLiked by 1 person
Hi, again, Iris! I actually did write each letter of the alphabet during the Handlettered ABCs challenge I hosted on Instagram with Nina Tran (@anintran). Have you seen it yet? You can either search under the hashtag (#handletteredABCs) on Instagram, or click on my #handletteredABCs page above on my blog menu. Let me know if you find it!
You can also follow along on our new Instagram account (@handletteredABCs). We’ll be posting more lettering tips that I hope will help you out!
LikeLike
Just as the previous posts,I am thrilled to have found you on Instagram 😊. Your step by step approach, your pleasant voice, your interest in helping others learn brush calligraphy is just what I have been searching for!! Let the practice begin👍
LikeLiked by 2 people
Thanks so much, Marilyn! I really appreciate it all of your kind words! Are you new to brush calligraphy? Are you on Instagram? I’d love to see some of your work! Happy writing!
LikeLike
Thanks so much for your tutorials. They are clear and helpful as I am attempting to improve my skills. I have been a little discouraged realizing how much I have to learn but your tutorials make it seem doable and practical. I’ve been filling up pages and pages of thin strokes 🙂 Can’t wait to see more.!
LikeLike
Hi Kate!!! You are so welcome. I’m happy to hear they are helpful and clear. Learning brush calligraphy (especially over the Internet) can be a challenge. My #1 goal is to make learning brush calligraphy easy for beginners, and it sounds like I’m headed in the right direction! Thanks so much for your kind words. Happy writing! Please let me know how else I can help, or if there is anything in particular you are interested in learning more about.
LikeLike
What notepad are you using here?
LikeLike
Hi there! This is a Rhodia reverse pad. Basically a spiral notepad with gridded paper. 🙂
LikeLike
Loving your videos. So helpful.
LikeLike
Thanks for stopping by, Mirelis!
LikeLike
It would be helpful to know which pen is the best for beginners. There are so many pens available and preferences differ drastically. I have had mire luck with crayola markers and gel pens for thinner lines. I would like to try the pentel fude touch but I hate to spend more money on pens I find difficult to use. It would be great if there was a way to try all of them first!
LikeLike
Hi Johanne! Great questions. The Pentel fude touch is an AWESOME pen for beginners. In fact, I just added it to my in-person workshops. I recommend a couple of pens over on my supplies page (see the link in my menu bar, or go to piecescalligraphy.com/supplies). Let me know if you have any questions!
LikeLike
Love your videos and I learn so much.
LikeLike
Yay! I’m so happy to hear that!
LikeLike
THANK YOU for this, I’d been struggling with the Tombow dual for awhile because I think now I realize I’d been trying to make the thin strokes too thin. Relief.
LikeLike
Thank you for this! I’d been struggling for awhile with the Tombow Dual Tips and I realize now I’d been trying to make my thin strokes too thin. The transition was looking jagged and I was very frustrated. Thank you!
LikeLike
You are so welcome, Jodi!!!
LikeLike