

If you follow me on Instagram, you are well aware of my love for Tombows.
I created this post (with a video at the end!) as an overview of the Tombow Dual Brush Pen.


The reason it is called a “dual” brush pen, is because on one end, there is a flexible tip…

I use the flexible tip 99% of the time. It is what allows me to create calligraphy with single strokes in a smooth, easy, consistent manner. Calligraphy is defined by its varying thick and thin lines, which you’ll see below as I demonstrate how I write.
And on the other end of the pen, there is a fine tip…

The fine tip does not allow for the thick and thin lines, as it has only one width. This is still extremely helpful for touching up what you’ve written with the flexible tip, it allows for smaller fonts, and it can easily be used to create faux calligraphy.
It is impossible to cover everything about brush pens in one post, so I’ll leave you with this simple drill that I do often to warm up my writing and practice.
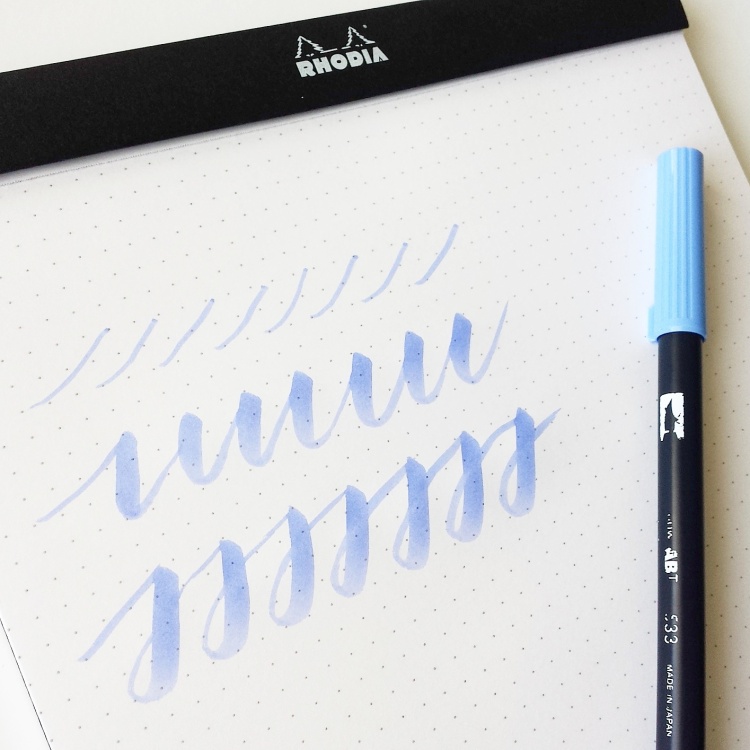
To see me doing this drill in action, you can find a quick video on this drill here.
And at last, I am excited to share with you a video longer than my usual 15-second Instagram clips. The video covers the Tombow dual brush pen briefly and I demonstrate how I write with it.
This is a huge step for me, as I have always wanted to film more in-depth videos and get into video editing. You are doing me a huge honor viewing my first full-length video! Thank you for your time.
~ ~ ~
Need more?
Find these pens at Tombow online.
Check out this brush tutorial from The Postman’s Knock.
~ ~ ~
It’s your turn!
What did you think of the Tombow dual brush pen overview?
Did you learn something new?
What is one thing regarding brush pens that you are struggling with?
~ ~ ~
P.S. If you liked this post, I’d love if you would share it!
P. P. S. Be sure you are subscribed to my blog below so you don’t miss a post!

I really like this markers, because they are soft, I didn’t know much what to do with the other tip so thanks for show us. I struggle with pressure and patience! I love this tutorial! Thanks so much for making them! Have a wonderful week!
LikeLike
Hi, Heidi! Yay, I’m so glad to help. Patience and practice are vital to improving. Keep it up! I will share more examples of how I use the fine tip when I get the chance. 🙂 🙂 Happy writing!
LikeLike
Thank you for the video and information! I just finished taking the I Still love Calligraphy class as well and I have been wanting to improve my brush marker skills! I bought the pentel brush pen but to be honest I have not enjoyed it at all!! After following you on instragram I recently bought some Tombow markers and I’m very excited to try them! I always love seeing your stuff on instragram!! Beautiful work! Keep up the good work!
LikeLike
Hi, Rachael! That is so awesome you got to take the I Still Love Calligraphy class! Thank you so much for your kind words. I’m glad to be of help and please continue to let me know what you think and what you need help with!
LikeLike
I love these markers but my upstrokes are never really that thin so there’s not a real calligraphy effect in the contrast. But thank you for showing your warm up! Totally going to practice those!
LikeLike
It took me a while to get used to my grip on the pen, which with time and practice, improved as I became more familiar with it. Take it stroke by stroke, letter by letter!!! I found it easier to break it down than to go straight into writing words.
LikeLike
I’m so glad you shared this post and video on how to use the Tombow brush pens. I have several, but didn’t really know the technique for making thick and thin strokes. I will practice more. Be well.
LikeLike
That makes me so happy to hear! Let me know how it goes and if I can help you with anything in particular. Happy writing! 🙂 🙂
LikeLike
First off, so fun to hear your pretty, soft voice. Second, it was very helpful. I struggle with similar problems mentioned. My thin lines when I make them are sometimes wiggly rather than straight. Does this just come with practice? You make it look so easy but it is such a pressure thing I guess. Oh, I found a Blick store close by, so excited to go & spend all my money!
LikeLike
Hi, Karen! As usual, you are so sweet! Glad you found this post and video helpful. I would say practice certainly has helped me get more comfortable with making straighter, more fluid lines. In the beginning, it is challenging because you’re thinking of so many things. As I get better at some things, I can focus more on others. Try breaking down each letter and fill an entire page with a single, simple stroke (similar to the little warm up drills I share at the end of my video). Keep me posted!
LikeLike
Random question-what kind of dark/black paper do you recommend using for projects? Thanks!
LikeLike
I cannot speak for darker colored paper too much since I rarely use it. I’ve had luck with regular cardstock that I found at any art store (Michael’s and Joanne’s included). My only tip would be to get matte and non-textured. Matte b/c I personally don’t like shiny or glossy and I hate the fingerprints that get stuck! And non-textured if you’re using pointed pen, but otherwise, texture is not bad. I’ve used it well with metallic Sharpie, uniball gel pens, and gelly roll pens.
LikeLike
I got some of this pens, I had experienced some of the problems mentioned above, like I can never seem to make thin lines and such! But I will take the online calligraphy class that you recommend, as soon as the summer is over!
LikeLike
That’s so awesome to hear you plan to take the class! Melissa is awesome and you will learn more than you ever could on your own. As for the brush pens, the thin lines take practice to achieve. Sometimes, I still struggle and have to take a step back and practice them before diving into words and longer pieces. Also, remember to go slowly. Slow is smooth, and smooth is fast (my favorite line from Melissa Esplin).
LikeLike
Great overview, it was nice to see how you hold the pen, maybe next time even a closer up on the angel. I have some Tombow, but didn’t know they could be used for calligraphy! Thank you!!
LikeLike
Hi, Thea! Glad you liked the post. Close up are definitely something I want to get better at capturing so I can include more of it on the blog! Try your hand at calligraphy with the Tombow pens! Let me know how it goes!
LikeLike
I have been using a tombow marker a few times over the last few days, mostly doing drills and now it seems a little dried out and feathering on the upstroke. Do you know why that may be?
LikeLike
Hi Megan! What kind of paper are you using? Is it smooth, untextured? Sometimes paper that is porous or too rough can fray your pen. Also, pay attention to the angle you are holding the pen and writing. I have a few posts on my learn page (piecescalligraphy.com/learn) that discuss how to hold the brush pen at the right angle. You don’t want to hold the pen too upright because it will kink the tip. Regarding the drying, if you believe you are capping your pens when not in use, then that is pretty strange for it to dry out. You can always contact Tombow’s customer service and hopefully they can send you a replacement.
LikeLike
How do you store your Tombows’? A few people in the reviews of Amazon have said that the vertical way of storing them will result in the ink draining to one side. Any tips?
LikeLike
Hi again, Darius! Personally, I store my Tombows BOTH vertically and horizontally, depending on where they are in my house! (I’m very disorganized – but working on it!). I have heard many people argue that storing them horizontally is best, however I cannot say for certain that I’ve noticed a difference. Sorry that wasn’t too helpful – but if you get any insight from experience, please share with me!
LikeLike
New to calligraphy. This is a very helpful intro video.
LikeLike
Awesome! So glad to have you, Suzes!
LikeLike